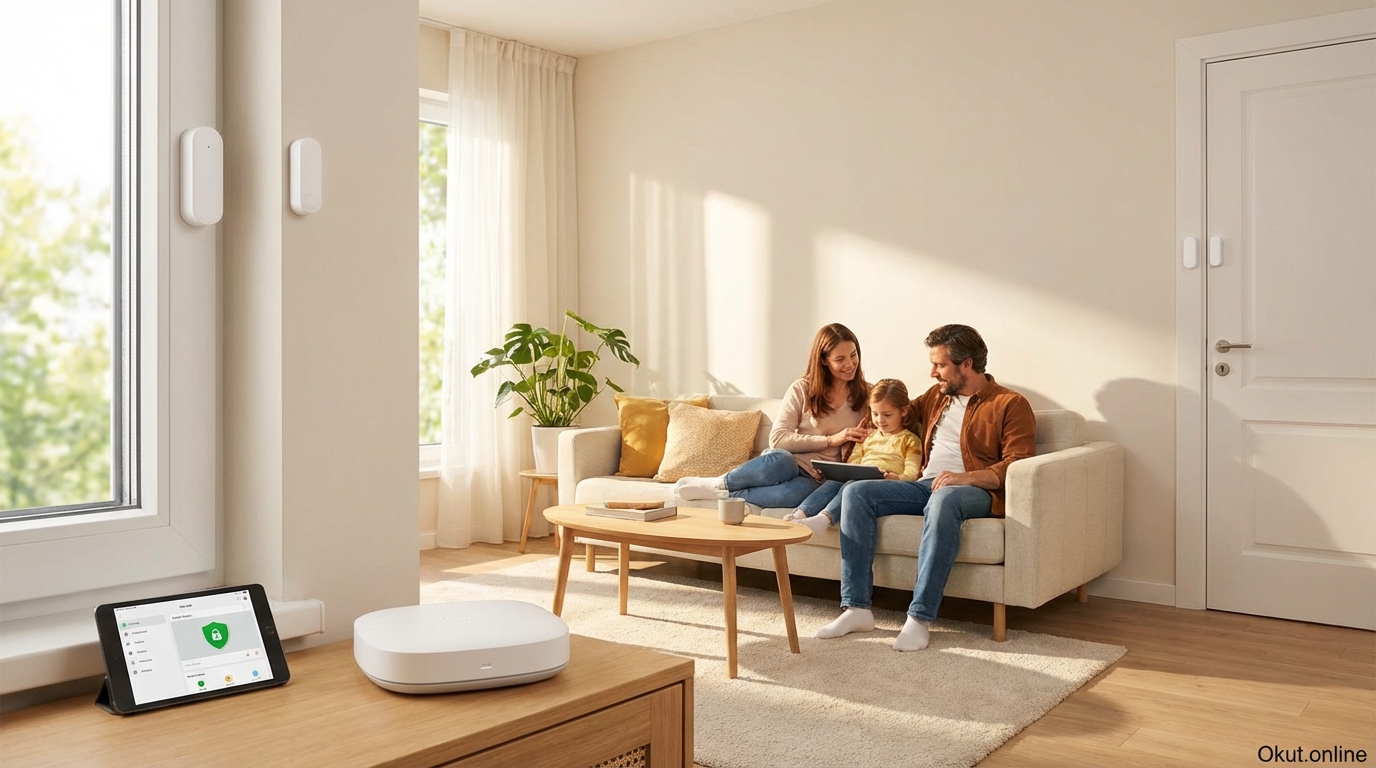
Window and door sensors form the first line of defense in any comprehensive smart home security system, instantly alerting you when entry points open—whether that’s your front door, a basement window, or a sliding patio door. In 2026, these sensors have evolved far beyond simple open/closed detection, adding vibration sensing, temperature monitoring, and sophisticated smart home integrations. This complete security guide covers sensor types, top product recommendations, strategic placement, and automation configurations that maximize the protective value of entry point monitoring.
I. How Window and Door Sensors Work
Understanding the underlying technology helps you select appropriate sensors for different applications and troubleshoot any installation issues that arise. The core technology is straightforward, but implementation details significantly affect reliability and functionality.
A. Magnetic Contact Sensors: The Foundation
The overwhelming majority of window and door sensors use magnetic reed switch technology—a simple, reliable mechanism that has proven itself over decades of security applications. This technology requires no power for the detection mechanism itself, contributing to the exceptional battery life these sensors achieve.
A reed switch consists of two thin metal contacts sealed inside a small glass tube. When a magnet approaches the switch, magnetic force pulls the contacts together, completing an electrical circuit. When the magnet moves away, spring tension separates the contacts and breaks the circuit. This binary state—circuit closed with magnet present, circuit open with magnet removed—indicates whether the door or window is closed or open.
A typical sensor installation places the reed switch component (containing batteries and wireless transmission) on the door or window frame, while the smaller magnet component attaches to the moving door or window itself. When closed, the magnet holds the switch closed; when the door or window opens, the magnet moves away and the reed switch opens, triggering the sensor to transmit an “open” status to your smart home hub or security system.
The passive nature of magnetic reed switches means they consume virtually no power during their primary function—power is only needed to transmit state changes wirelessly. This is why battery life often reaches 2-5 years even in high-traffic sensors that open and close dozens of times daily. The electronics sleep until a state change wakes them, transmitting the new status before returning to sleep.
Gap tolerance—how far apart the sensor and magnet can be while still registering as “closed”—varies between products but typically ranges from 0.5 inches to 1.5 inches. Sensors with wider gap tolerance accommodate thicker window frames, door misalignment, or installations where close positioning isn’t possible. Most quality sensors specify their maximum gap distance in documentation.
B. Vibration and Glass Break Detection
Some window sensors incorporate vibration detection that alerts before a window actually opens—potentially while someone is still trying to break in rather than after they’ve gained entry.
Vibration sensors use accelerometers or piezoelectric elements that detect physical vibration in the glass or frame. When someone attempts to break a window, the impact vibrations register on the sensor and trigger an alert. This provides early warning—the sensor alerts during the break-in attempt, potentially scaring off intruders or providing extra response time before they actually enter.
Glass break sensors take this concept further with audio analysis that specifically detects the distinctive sound frequency pattern of shattering glass. These sensors listen continuously for the combination of initial impact (thud) followed by glass flexing (high-frequency vibration) and finally breaking (sharp, high-frequency shattering sound). The multi-stage detection pattern reduces false alarms from other loud sounds while reliably catching actual glass breaks.
Combined sensors offering both magnetic contact and vibration detection provide layered protection—vibration alerts during a break-in attempt, and magnetic contact confirms if entry actually occurs. For ground-floor windows accessible from outside, this combination offers more complete protection than simple open/closed monitoring alone.
C. Communication Protocols
How sensors communicate with your smart home system significantly affects reliability, battery life, and integration capabilities. Understanding the major protocols helps you choose compatible sensors.
Zigbee has become the dominant protocol for retail smart home sensors due to its mesh networking capability, low power consumption, and broad compatibility. Zigbee sensors communicate with a hub (Samsung SmartThings, Amazon Echo with built-in Zigbee, or dedicated Zigbee coordinators), and in mesh-capable implementations, sensors can relay signals through each other, extending range throughout your home. Zigbee 3.0 devices generally work across different manufacturers’ hubs, though some proprietary extensions may limit full functionality.
Z-Wave offers similar mesh networking with generally better interoperability due to stricter certification requirements. Z-Wave sensors from different manufacturers typically work seamlessly together, though Z-Wave devices cost slightly more on average than Zigbee equivalents. Z-Wave operates on different frequencies than Wi-Fi, avoiding interference in congested RF environments.
Proprietary protocols used by systems like Ring, SimpliSafe, and Nest require sensors from the same ecosystem. You cannot use Ring sensors with SimpliSafe or vice versa. This lock-in limits flexibility but often provides tighter integration within the ecosystem, with sensors and hub designed to work together optimally.
Wi-Fi sensors connect directly to your router without a separate hub. This simplifies initial setup but typically consumes more battery power (Wi-Fi radios use more energy than Zigbee or Z-Wave) and adds individual devices to your network (which can overwhelm consumer routers in larger sensor deployments).
II. Top Window and Door Sensors (2026)
The sensor market ranges from ultra-affordable options suitable for extensive deployments to feature-rich premium sensors for critical locations. The right choice depends on your ecosystem, deployment scale, and specific feature requirements.
A. Aqara Door and Window Sensor P2 – $19.99
The Aqara P2 represents the current sweet spot for connected home enthusiasts, combining excellent build quality with broad compatibility and Matter/Thread future-proofing.
Zigbee 3.0 connectivity ensures compatibility with most smart home hubs including SmartThings, Amazon Echo (4th gen and later with built-in Zigbee hub), Apple Home (via Aqara hub or third-party bridges), and Home Assistant. The sensor joins your existing Zigbee mesh, benefiting from and contributing to network reliability if you have other powered Zigbee devices serving as routers.
Matter support through an Aqara hub enables connection to any Matter-compatible controller, future-proofing your investment as the smart home industry consolidates around this unified standard. Matter connectivity simplifies multi-platform households where some family members prefer Apple while others use Google or Amazon.
Ultra-compact design measures barely larger than a thick coin, making the sensor virtually invisible on most door and window frames. The included mounting tape uses 3M VHB adhesive that holds securely on most clean surfaces without screws that might damage trim work.
Battery life reaches 5 years under typical use with the included CR1632 coin cell battery. Low-battery warnings arrive through your smart home app weeks before the battery actually fails, providing ample time to obtain replacements without service gaps.
Temperature monitoring adds supplementary functionality—each sensor reports ambient temperature, enabling climate-related automations or simply providing multi-point temperature data throughout your home. The temperature data might trigger alerts if a room gets too cold (indicating a failing heater or accidentally open window in winter) or inform HVAC automation decisions.
B. Ring Alarm Contact Sensor (2nd Gen) – $19.99
For Ring Alarm households, the official contact sensors provide seamless integration that powers comprehensive security monitoring with professional monitoring options.
Ring Alarm ecosystem integration places these sensors within a complete security system rather than a general smart home platform. When Ring Alarm is armed, opened sensors trigger alarm responses with optional professional monitoring dispatch. The sensors appear in the Ring app alongside cameras and doorbells, providing unified security management.
Alexa integration extends beyond basic functionality—Alexa can announce which specific door or window opened, trigger routines based on sensor state, and incorporate sensor status into Alexa Guard monitoring. “Alexa, is the front door locked?” or “Alexa, are all windows closed?” queries work with proper sensor setup.
Installation-friendly design includes adhesive mounting for renters or those avoiding screw holes, along with a slim profile that fits most window and door configurations. The two-piece design (sensor and magnet) allows flexible positioning to accommodate unusual frame geometries.
Extended battery life of 3 years comes from a replaceable CR123A battery. The Ring app monitors battery status and alerts well before depletion, and replacement batteries are commonly available at pharmacies and home improvement stores.
The limitation is ecosystem lock-in—Ring sensors only work with Ring systems. If you later switch security platforms, these sensors become useless. For committed Ring users, this matters little; for those uncertain about long-term platform choice, Zigbee or Z-Wave options preserve flexibility.
C. SimpliSafe Entry Sensor – $14.99
SimpliSafe’s integrated approach provides professional-grade security monitoring at accessible prices, with sensors designed specifically for their system.
One-touch installation distinguishes SimpliSafe sensors from more complex alternatives. The sensor arrives paired to your SimpliSafe base station—peel adhesive backing, stick sensor on frame, stick magnet on door/window, done. No hub configuration, no pairing procedures, no app-based setup. The sensor simply works immediately.
Secret Alert capability sends you notifications without triggering audible alarms—useful for monitoring when children arrive home, tracking which doors elderly family members use, or other awareness applications where you want information without alarm response. You can configure each sensor independently for standard alarm response or secret alert mode.
Professional monitoring integration means these sensors connect to SimpliSafe’s 24/7 monitoring center when you subscribe ($17.99/month for basic monitoring). Opened sensors while the system is armed trigger monitoring center response, verification calls, and emergency dispatch if needed.
The 5-year battery life uses lithium batteries that maintain performance across temperature extremes, important for sensors on exterior doors or poorly insulated window frames that experience temperature variations. Low-battery notification arrives weeks before failure through the SimpliSafe app.
D. Eve Door & Window Sensor – $39.95
For Apple-focused households wanting native HomeKit without bridges or hubs, Eve provides direct Thread/Matter connectivity with enhanced privacy through local-only processing.
Native Thread protocol connects the sensor directly to your Apple Home ecosystem via Thread border routers (HomePod mini, Apple TV 4K, or other Thread border routers). No separate hub or bridge required—the sensor joins your Thread mesh and appears in Apple’s Home app immediately.
No cloud dependency means your sensor data never leaves your home network unless you explicitly choose to share it. Eve doesn’t collect usage data, doesn’t require accounts beyond your Apple ID, and operates entirely through local Apple Home infrastructure. For privacy-focused users, this local-only architecture provides peace of mind that cloud-dependent systems cannot.
HomeKit automation integration creates sophisticated responses to door and window events. Front door opening triggers hallway lights, window opening in summer pauses air conditioning (why cool air you’re venting outside?), any sensor opening while everyone is away sends immediate alerts. The full power of HomeKit automation applies to Eve sensor events.
Premium build quality justifies the higher price for users wanting the best available construction. Metal components, precise magnetic sensing, and thoughtful design details create a sensor that feels (and functions) distinctly better than budget alternatives—though whether that quality difference matters more than the 2x-3x price premium is a personal judgment.
III. Strategic Sensor Placement
Where you place sensors determines whether your system actually protects your home or leaves exploitable gaps. Strategic placement requires thinking like an intruder—what entry points would someone choose, and in what sequence would they move through your home?
A. Prioritizing Entry Points
Not all doors and windows present equal risk. Focus initial sensor deployment on the highest-risk entry points, expanding coverage as budget and time allow.
Exterior doors represent the most critical sensor locations. Every door providing outside access to your home—front door, back door, garage entry door, side doors, basement exterior doors—should have sensor coverage. Doors are the obvious entry point, and even an intruder choosing window entry will likely exit through a door. Full door coverage is non-negotiable for meaningful security.
Ground-floor windows accessible from outside deserve high priority after doors. Windows that can be reached without ladders, especially those concealed from street view by landscaping or fences, attract intruder attention. Back yard windows, basement windows, and windows behind bushes warrant earlier coverage than prominently visible front windows that provide poor concealment.
Second-story windows seem safe but aren’t always—windows accessible from roofs, adjacent structures, or even tall ladders can provide entry. Evaluate whether any second-story windows have realistic access paths that might attract an intruder and prioritize those accordingly.
Interior doors typically matter less for security but enable useful automations—sensing the bedroom door to trigger morning routines, monitoring the baby’s room door, tracking a teenager’s comings and goings. Security priority should go to exterior points; interior sensors address convenience and monitoring use cases.
B. Installation Positioning
Sensor and magnet positioning affects both reliability and security. Proper installation ensures accurate detection and prevents easy defeat.
Mount the main sensor (the larger component with battery and electronics) on the stationary frame rather than the moving door or window. This protects the electronics from the vibration and repeated movement of door opening and closing, extending sensor life and preventing mounting adhesive loosening.
Position the magnet on the moving element (door or window), aligned with the sensor when closed. Most sensors include alignment marks or are sensitive enough that exact positioning isn’t critical—but verify during installation that opening even slightly breaks the magnetic connection. A door that can be opened an inch without triggering the sensor creates a security gap.
Gap distance between sensor and magnet when closed should typically be under 0.75 inches for reliable detection, though this varies by sensor. Check manufacturer specifications and test after installation. If the gap is marginal, future frame shifting or seasonal expansion/contraction could push it beyond reliable detection.
Sensor positioning should make tampering difficult. Mounting at the top of door frames rather than the side makes sensors harder to reach for anyone attempting to disable them. Sensors behind strike plates or in other concealed positions are more secure than exposed mounts, though aesthetics and installation difficulty must be balanced.
C. Special Installation Situations
Some door and window types require modified installation approaches for reliable detection.
French doors and double doors require sensors on both doors since either can open independently. Consider the overlap between doors when positioning—you want to detect either door opening, not just specific movement patterns that might leave gaps.
Sliding doors need sensors positioned to detect the sliding motion. Mount the sensor on the frame and the magnet on the door itself at a point where even partial opening breaks magnetic contact. Some sensors designed specifically for sliding doors accommodate the longer movement ranges involved.
Casement windows (the type that crank outward) require sensor placement accounting for the opening arc. The magnet travels in an arc rather than straight away from the sensor, requiring positioning that maintains detection throughout the opening motion.
Metal doors and frames can interfere with magnetic sensing. Strong magnets in steel doors may influence the sensor; steel frames may shield magnetic fields. Test positioning carefully on metal installations and consider recessed sensors designed to mount within drilled holes where frame material doesn’t block the magnetic field.
Glass doors present no inherent challenges for magnetic sensors—the sensor and magnet mount on frame and moving glass just as with any door. However, full-glass doors without substantial frames may require creative mounting solutions maintaining aesthetics while achieving reliable detection.
IV. Security System Integration
Sensors provide maximum security value when integrated into complete security systems that respond automatically to entry events—not just send notifications you might miss.
A. Alarm System Configuration
Properly configured alarm systems distinguish between expected entry through designated doors with time to disarm, and unexpected entry through other points that should trigger immediate alarm response.
Entry delay zones apply to doors where you normally enter and need time to disarm the system. The front door typically has a 30-60 second entry delay—when opened while armed, a warning begins and you have that duration to disarm before the full alarm triggers. Without entry delay, you’d trigger your own alarm every time you came home while the system was armed.
Instant zones trigger immediately without delay when opened while the system is armed. Windows, back doors you wouldn’t use when arriving home, and any entry point that wouldn’t legitimately be your first point of entry should configure as instant zones. An intruder entering through a back window should trigger immediate alarm response, not a courtesy delay.
Perimeter versus interior zones distinguish sensors that monitor the boundary of your home from those monitoring interior areas. Perimeter sensors (exterior doors and windows) arm when you set the system to “Away” or “Home” mode. Interior sensors (motion detectors inside the house) may arm only in “Away” mode, allowing you to move freely inside your home in “Home” mode without triggering motion-based alarms while perimeter entry points remain monitored.
Bypassing individual sensors provides flexibility when you need a window open for ventilation but want the rest of the system armed. Explicitly bypassing that sensor removes it from monitoring temporarily, preventing false alarms while maintaining protection elsewhere. The app should clearly indicate bypassed sensors so you don’t forget to restore them.
B. Notification Configuration
Notification settings determine whether you receive useful security awareness or annoying spam that trains you to ignore alerts.
Immediate notifications for armed system triggers make sense—if someone opens a door while your alarm is armed, you want to know immediately regardless of time, activity, or phone notification settings.
Conditional notifications for normal activity reduce notification fatigue. You probably don’t need a notification every time family members use the front door during normal hours. Instead, configure notifications for unusual events: door openings after midnight, entry when everyone is supposed to be away, or sensors that rarely activate suddenly opening.
Left-open reminders alert you when doors or windows remain open beyond a threshold—useful for catching accidentally unlocked doors or windows left open when rain approaches. Configure reasonable thresholds that catch genuine oversights without alerting every time you prop a door open to carry groceries.
Child activity monitoring uses sensors to track when children arrive home from school or leave the house at unexpected times. Secret alert modes send you information without triggering alarms, providing awareness without treating normal childhood activity as security threats.
V. Smart Home Automations
Beyond security monitoring, window and door sensors enable convenience and efficiency automations that improve daily life throughout your connected home.
A. Lighting Automations
Door sensors trigger appropriate lighting without fumbling for switches in the dark or leaving lights on in unoccupied areas.
Entry lighting turns on when you open the front door after dark—hallway lights, living room lamps, or a specific “welcome home” scene illuminate automatically. The automation might trigger only after sunset and before sunrise, avoiding unnecessary activation during daylight hours.
Exit lighting activates exterior lights when doors open from inside at night, illuminating your path to vehicles or giving you visibility when investigating sounds. After a few minutes with no further activity, lights return to their previous state.
Room-specific lighting in combination with motion sensors uses door sensors to detect entry into rooms (door opened) and motion sensors to detect exit (motion ceased). This combination provides more reliable room occupancy detection than either sensor type alone.
B. Climate Control Integration
Window sensors can dramatically improve HVAC efficiency by detecting when conditioned air vents to outdoor spaces.
AC/heating pause when windows open stops conditioning air that’s immediately escaping. If you open a window during summer, continuing to run air conditioning wastes energy cooling air that vents outside—pausing until the window closes saves energy and money while maintaining realistic expectations (you opened the window for a reason; cooling won’t help).
Zone-specific adjustments go further with smart vent systems. An open window in one room might close that room’s vents and redirect conditioned air elsewhere, rather than pausing the entire system. This maintains comfort in other rooms while acknowledging the open window in one area.
Alert without action suits some scenarios better than automatic response. Perhaps you want to know a window is open during heating season without the thermostat automatically responding—the notification reminds you to close it while leaving HVAC control to your normal preferences.
C. Security Coordination
Sensors work together with other security devices for comprehensive protection beyond what any single device provides.
Camera recording triggered by sensor events ensures cameras capture footage before motion detection would naturally activate. A door sensor triggering camera recording might capture an intruder’s approach that motion-only triggering would miss because the camera wasn’t yet recording.
Light activation when sensors trigger can deter intruders or simply illuminate areas for better camera footage. All exterior lights flashing might scare off an intruder attempting window entry; targeted illumination of the entry area ensures your camera captures identifiable footage.
Smart lock coordination might automatically lock doors when window sensors indicate all windows are closed, or unlock the front door when your garage door sensor indicates you’ve arrived home by car.
VI. Battery and Maintenance Considerations
Reliable security depends on functional sensors—and functional sensors require attention to batteries and periodic verification that everything works as expected.
A. Battery Management
Battery life varies dramatically based on sensor protocol, transmission frequency, and installation environment. Understanding expected performance helps you plan replacements before failures create security gaps.
Typical battery life ranges from 1-5 years depending on sensor design. Zigbee and Z-Wave sensors with efficient sleep modes often reach the high end; Wi-Fi sensors’ higher power consumption typically means 1-2 year batteries. High-traffic sensors (front doors opened many times daily) deplete faster than rarely-used sensors.
Low-battery warnings arrive through your smart home app, typically 2-4 weeks before actual depletion. Respond promptly—once warned, obtain replacement batteries immediately rather than waiting. The warning period exists to prevent gaps; don’t squander it.
Standard battery types in most sensors include CR123A, CR2032, and CR2450, commonly available at pharmacies, home improvement stores, and online. Stock a few spares of each type your sensors use so replacements don’t require shopping trips.
Temperature extremes accelerate battery depletion. Sensors on exterior doors exposed to extreme cold or heat may need more frequent replacement than interior sensors in climate-controlled environments. Plan for annual replacement of outdoor-exposed sensors regardless of battery status indicators.
B. Testing Protocol
Sensors can fail without obvious indication—a dead sensor might simply stop reporting rather than announcing its failure. Regular testing catches problems before they matter.
Monthly testing should include opening each monitored door and window while watching your app for immediate status updates. Confirm every sensor responds correctly and promptly. Testing takes minutes and provides confidence your system actually works.
Alarm system testing verifies that sensors properly trigger alarm responses. Put your system in test mode (preventing actual monitoring center dispatch), arm it, and deliberately trigger sensors. Verify alarms activate as expected, notifications arrive, and sirens sound. Many monitoring services provide a test mode or scheduled test times for this purpose.
Visual inspection during testing catches physical problems: sensor or magnet shifted out of alignment, adhesive failing, or damage from impacts or environmental exposure. Reposition or replace compromised sensors promptly.
VII. Common Mistakes to Avoid
- Incomplete Coverage: Covering some doors and windows while leaving others unmonitored creates false security. Intruders probe for the path of least resistance—an unmonitored back window negates front door sensors. Cover all accessible entry points.
- Ignoring Garage Entry: The door from your garage to your home often receives less attention than front or back doors, yet provides ideal concealed entry once someone gains garage access. Sensor this interior door as the critical entry point it represents.
- Adhesive on Dirty Surfaces: Sensors falling off frames creates gaps and can damage sensors. Clean mounting surfaces with alcohol wipes before applying adhesive, and press firmly for full contact. For critical sensors, consider supplementary screws even if adhesive seems adequate.
- Marginal Gap Positioning: Installing sensors where the magnet barely maintains contact works initially but fails when seasonal humidity changes cause wood expansion or when settling shifts frame alignment. Position with comfortable margin—if close tolerances are unavoidable, use sensors specifically rated for larger gaps.
- No Testing After Installation: Assuming sensors work because they installed without immediate problems misses wiring issues, configuration errors, or marginal positioning that causes inconsistent detection. Test every sensor immediately after installation and periodically thereafter.
VIII. Practical Tips for Maximum Protection
- Name Sensors Specifically: “Front Door,” “Master Bedroom Window North,” and “Garage Entry” prove far more useful than “Sensor 1,” “Sensor 2,” “Sensor 3” when reviewing alerts or debugging problems. Invest time in meaningful names during setup.
- Document Your Deployment: Create a list or diagram showing every sensor, its location, what it protects, and when it was installed. This documentation aids troubleshooting, helps you verify complete coverage, and informs future expansions or modifications.
- Consider Vibration Sensors for Ground Floor Windows: Especially for windows concealed from street view, sensors that alert during break-in attempts (before entry occurs) provide more actionable warning than sensors that only report after entry.
- Integrate with Cameras: Configure door and window sensor events to trigger camera recording. This coordination captures footage of entry events that motion-triggered recording alone might miss.
- Review Logs Periodically: Sensor activity logs reveal patterns that might indicate security concerns—unexplained openings, patterns suggesting someone testing entry points, or sensors that stop reporting (indicating possible failure or tampering).
IX. Conclusion
Window and door sensors provide the essential entry-point monitoring that transforms a smart home into a genuinely secure home. Quality sensors from Aqara, Ring, SimpliSafe, and Eve offer reliable detection at accessible prices, with features ranging from basic open/closed status to vibration sensing and climate monitoring. Strategic placement prioritizing all exterior doors and accessible windows, proper integration with alarm and automation systems, and regular testing ensure your sensors actually protect rather than providing false confidence. Whether you’re building a comprehensive security system or simply want to know when the back door opens, window and door sensors deliver immediate, reliable awareness of activity at your home’s entry points.
How many entry points does your home have, and which sensors are you considering for protection? Share your security planning in the comments!