Your garage door represents the largest—and often most forgotten—entry point to your home. Smart garage door openers and controllers transform this vulnerability into a connected, monitored, and automated access point. In 2026, options range from complete opener replacements with integrated smart technology to affordable retrofit devices that add intelligence to your existing opener. This comprehensive guide compares top products, explains control systems, and helps you choose the right smart garage solution for your situation.
I. Understanding Smart Garage Technology
Smart garage technology falls into two categories: integrated smart openers that replace your entire unit, and retrofit controllers that add connectivity to existing openers. Both approaches achieve similar functionality—remote control, monitoring, and automation—through different implementation paths with distinct advantages and trade-offs.
A. Integrated Smart Garage Door Openers
Integrated smart openers combine the mechanical lifting mechanism with built-in Wi-Fi connectivity, positioning sensors, and camera options in a single unit. These represent the premium approach with maximum features and minimum compatibility concerns about retrofit connections.
Direct cloud connectivity means the opener itself connects to your home network and the manufacturer’s cloud services without additional hardware. When you tap the button in your phone app, the command travels from your phone to the manufacturer’s server to your opener—a process that typically takes under a second. The same connectivity enables status monitoring, notifications when the door opens or closes, and integration with major smart home platforms.
Integrated cameras, available on higher-end models, show you visual verification of your garage status beyond just “open” or “closed.” You can see whether your car is parked inside, whether your teenager actually closed the door after they said they did, and get visual recordings when the door operates. This visual confirmation eliminates the doubt that sometimes accompanies app-based status indicators.
Battery backup systems on premium openers maintain operation during power outages. Standard openers become completely non-functional when power fails—you must use the emergency release and manually lift the door. Battery backup maintains motorized operation for a limited number of cycles (typically 20-50 door operations depending on the backup size), providing continued access during typical outages.
The primary disadvantage is cost and installation complexity. A quality smart opener costs $300-500 installed, and DIY installation requires moderate mechanical skill, proper tools, and several hours of work. If your existing opener works fine mechanically, replacing the entire unit just for smart features may represent unnecessary expense.
B. Retrofit Smart Controllers
Retrofit controllers add smart capabilities to your existing garage door opener by connecting to the opener’s control terminals and adding a sensor to detect door position. This approach preserves your working opener while adding remote control and automation.
The retrofit device connects where your existing wall button connects—the same terminals that receive the “operate” signal when you press the wall button. The smart controller sends that same signal remotely when commanded through the app or automation. A separate sensor (usually magnetic, attached to the door with the counterpart on the frame) detects whether the door is open or closed.
Compatibility with nearly any opener manufactured in the last two decades makes retrofitting accessible for most homeowners. As long as your opener has terminals accepting a simple contact closure (two wires touching) as its trigger signal, retrofit controllers will work. Some very old or unusual openers may have proprietary control systems that complicate installation, but standard units from major manufacturers work straightforwardly.
Cost runs $30-80 for basic retrofit controllers, making this the budget-friendly approach for adding smart features. When your opener already works reliably, spending $50 on a retrofit controller versus $400+ on a complete replacement provides the same app-based control at a fraction of the cost.
The trade-off is slightly more complex installation than integrated openers (you’re adding components to an existing system) and potentially less polished integration since you’re connecting different manufacturers’ products. Most users find these trade-offs acceptable given the significant cost savings.
II. Top Smart Garage Door Openers (2026)
These integrated smart openers represent the best options for homeowners installing new garage door openers or replacing failed units. They combine mechanical quality with comprehensive smart features.
A. Chamberlain B6753T Smart Garage Opener – $379
Chamberlain dominates the residential garage opener market, and the B6753T represents their sweet spot balancing features and price for smart-home-focused homeowners.
The myQ smart platform provides the connectivity foundation, a mature system with apps for iOS and Android, integration with major smart home platforms, and reliable cloud infrastructure developed over many years of market leadership. The myQ app shows real-time door status, allows remote operation from anywhere with internet connectivity, and provides activity history showing when the door opened and closed.
Belt drive operation produces remarkably quiet operation—typically under 50dB—compared to traditional chain drives that can exceed 70dB. If your garage shares walls with living spaces or bedrooms, belt drive elimination of mechanical chain noise significantly improves household peace. The belt itself requires no lubrication and provides smoother operation than chain alternatives.
Built-in camera and LED lighting combine security verification with garage illumination. The camera shows real-time and recorded video of your garage interior, confirming door status visually and recording activity when motion is detected. The integrated LED lighting illuminates your garage when the door operates or on demand through the app—bright enough for finding items without separate garage lights.
Battery backup provides approximately 50 door cycles during power outages using the integrated backup battery. This capacity handles typical outages lasting hours to a couple days with normal daily usage. The battery charge level appears in the app so you know your backup status before you need it.
Smartphone control as an opener option eliminates the need for separate remote controls. The myQ app can serve as your primary opener method—your phone replaces the remotes you might lose, break, or leave in the wrong vehicle. Traditional remotes still work for household members who prefer them.
B. LiftMaster 87504 Smart Garage Opener – $449
LiftMaster, Chamberlain’s professional-grade sister brand, offers enhanced durability and features for those willing to pay premium prices for premium quality.
Integrated Camera and LED mirrors Chamberlain’s offering with enhanced video quality suitable for security applications. The camera captures 1080p video with color night vision, providing clear footage regardless of garage lighting conditions. Two-way audio allows conversation with anyone in your garage through the app—useful for directing delivery drivers or communicating with family members.
DC motor with battery backup operates more quietly than comparable AC motors while providing seamless operation during power outages. The DC motor soft starts and stops rather than engaging abruptly, reducing stress on door mechanisms and providing that whisper-quiet operation premium buyers expect.
The same myQ platform as Chamberlain provides app control, but LiftMaster additionally offers myQ Lock functionality that converts your garage entry door deadbolt into a smart lock integrated with your opener. When you close the garage door, the entry door can lock automatically—ensuring you never forget to secure both access points.
Professional installation is recommended by LiftMaster and included in most dealer pricing. While DIY installation is possible, the premium positioning of LiftMaster products typically targets customers preferring professional service. Dealer installation ensures proper calibration and often includes extended warranty benefits.
C. Genie StealthDrive Connect – $289
Genie offers value-focused alternatives to Chamberlain/LiftMaster dominance with competitive features at lower price points.
The Aladdin Connect smart system provides myQ-equivalent functionality through Genie’s own platform. App-based control, status monitoring, guest access, and voice assistant integration all work comparably to the Chamberlain ecosystem. Aladdin Connect also integrates with many smart home platforms including SmartThings and Home Assistant.
Quiet belt drive with DC motor delivers sub-50dB operation competitive with premium competitors. The DC motor’s soft start/stop operation extends door hardware life by eliminating jarring starts and stops that stress springs and tracks over time.
Built-in LED lighting provides 1,200 lumens of garage illumination, bright enough for workshop tasks without separate lighting. Motion sensing activates lights when you enter through the pedestrian door, and timer-based shutoff prevents accidentally leaving lights on.
No camera option on this model represents the primary feature gap versus premium competitors. If visual verification matters to your use case, you’ll need a separate camera or an upgrade to a camera-equipped model.
III. Top Retrofit Controllers (2026)
Retrofit controllers add smart features to your existing opener, costing a fraction of replacement while providing equivalent app control and automation capabilities.
A. Chamberlain myQ Smart Garage Hub – $29.98
The myQ hub brings Chamberlain’s mature smart platform to any opener, providing app control through the same interface used by integrated Chamberlain/LiftMaster openers.
Universal compatibility works with any garage door opener manufactured after 1993 that uses standard control logic. The hub connects to your opener’s wall button terminals, simulating a button press when commanded through the app. A separate door sensor mounted on the door itself detects position.
The myQ app provides remote open/close control, real-time status display, activity history, and guest access for sharing control with family members or services like in-garage delivery. The interface is polished after years of development and iteration based on millions of active users.
Smart home integrations include Google Assistant, IFTTT, and select Amazon Alexa functionality (with some Key by Amazon integration restrictions). HomeKit support requires an additional bridge ($60) that some users find frustrating given the extra expense and complexity.
Installation takes 30-60 minutes for most users. Mount the hub within Wi-Fi range, connect two wires to your opener’s terminals, install the door sensor, and configure through the app. The most challenging part for some users is locating the correct terminals on their specific opener model—myQ provides online guides for most common openers.
At under $30, the myQ hub represents exceptional value for adding smart features. The cost is low enough that even renters might consider installation with landlord permission, planning to take the device when moving.
B. Meross Smart Garage Door Opener – $49.99
Meross offers an alternative to myQ with native HomeKit support that Apple-focused households appreciate without the additional bridge cost myQ requires.
Native HomeKit and Matter support distinguishes Meross from myQ’s HomeKit limitations. The Meross controller appears directly in Apple’s Home app without bridges, enabling Siri commands, HomeKit automations, and seamless integration with other Apple ecosystem devices. The same controller also works with Google Home, Amazon Alexa, and SmartThings.
Dual-door support on a single hub controls up to two garage doors from one device, useful for two-car garages with independent openers. Each door has independent sensors and app controls, and automations can operate doors individually or together.
The Meross app provides control outside the Apple ecosystem with features including scheduling, notifications, and family sharing. The app works fine though isn’t quite as polished as myQ’s more mature software.
Installation mirrors myQ complexity—wire connections to opener terminals and door sensor installation. Meross documentation is adequate but less comprehensive than Chamberlain’s extensive support resources. Tech-comfortable users find installation straightforward; those less confident may prefer the more thoroughly documented myQ option.
C. Nexx Garage NXG-200 – $89
Nexx emphasizes advanced features and automation capabilities that power users and smart home enthusiasts appreciate.
Geofencing auto-open and close uses your phone’s location to trigger garage operation automatically. As you approach home, the door opens for immediate access; as you leave, it closes behind you without any app interaction. This automation requires careful configuration to prevent unwanted openings (you don’t want the door opening just because you’re passing by on the adjacent street).
IFTTT integration enables complex automations connecting garage operation to hundreds of other services and devices. Trigger door operations based on Nest thermostat being set to Away, Ring doorbell detecting motion, or any other IFTTT-connected event. This flexibility appeals to smart home power users building sophisticated automated systems.
Multi-door and multi-user management handles complex households with multiple doors and many family members. Different users can have different permissions—perhaps teenagers can open but auto-close is mandatory for their profile, while adults have full manual control.
Installation matches other retrofit controllers with wired connection to opener terminals and separate door sensor mounting. The higher price point expects users comfortable with DIY installation; professional installation for a $89 device rarely makes economic sense.
IV. Essential Features to Consider
When evaluating smart garage products, these features determine day-to-day usability and satisfaction with your investment.
A. Remote Monitoring and Control
The fundamental smart feature—operating and checking your garage from anywhere—seems obvious but implementation quality varies significantly between products.
Response time between tapping “open” and the door actually moving should be 1-2 seconds in good implementations, potentially 5-10 seconds in poor ones. Test or research response times before purchasing; slow response quickly becomes frustrating with daily use.
Status accuracy matters more than you might expect. Some systems occasionally show incorrect status—reporting closed when actually open or vice versa. Inaccurate status defeats the purpose of remote monitoring and can leave you uncertain whether your home is secure. User reviews often reveal status reliability issues that specifications don’t.
Push notifications when the door opens, closes, or is left open beyond a threshold provide awareness without actively checking the app. Configurable thresholds (alert if open more than 10 minutes, for example) prevent notification spam while ensuring you know about unusual situations.
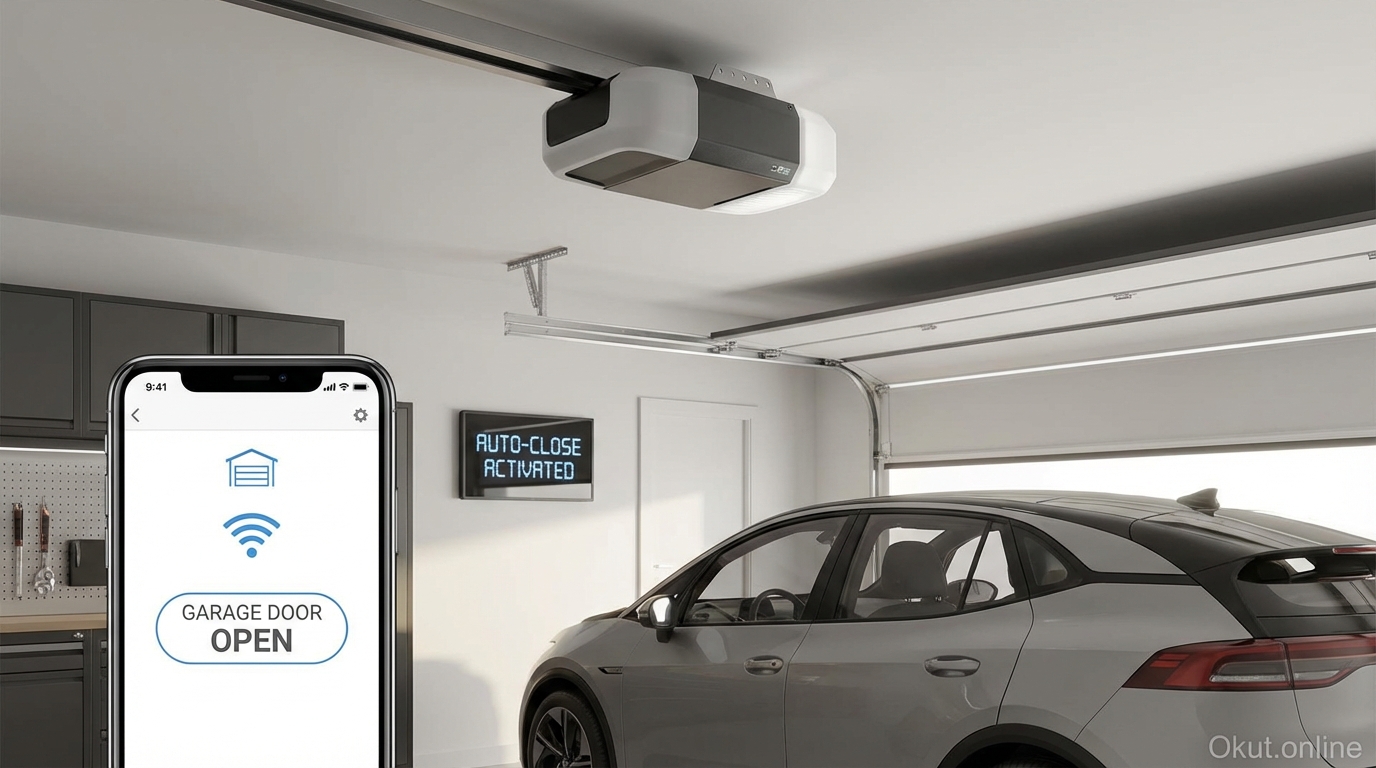
B. Auto-Close Functionality
Auto-close automatically shuts the garage door if left open beyond a configured time, eliminating the security risk of accidentally leaving your garage accessible for hours or overnight.
Time delays typically range from 5 minutes to several hours. Short delays suit households where unintended open doors should close quickly; longer delays accommodate intentional open-door situations like working in the garage with the door up for ventilation.
Safety considerations require attention when configuring auto-close. The door must have properly functioning safety sensors that prevent closing on people, pets, or objects in the doorway. Test safety reversal before relying on auto-close—a door that closes on someone or something because auto-close activated creates serious hazard.
Conditional auto-close on some systems only activates during certain times (perhaps only at night) or when the home automation system believes you’re away. These conditions prevent closing the door while you’re intentionally working in the driveway or loading vehicles.
C. Voice Assistant Integration
Voice control through Alexa, Google Assistant, or Siri provides hands-free operation when your hands are full of groceries or you’re elsewhere in the house.
“Hey Google, close the garage door” works as expected with most smart garage products after initial linking. This voice command from anywhere in your home—living room, bedroom, or connected vehicle—provides convenience that button pressing cannot match.
Security considerations around voice-activated opening deserve attention. Most systems require either a PIN spoken as part of the command or accomplish opening only through explicit app confirmation to prevent unauthorized voice commands from opening your garage. You generally don’t want guests, neighbors within earshot, or even your television providing voice commands that open your garage.
Routines and scenes integrate garage operation into multi-step automations. A “Goodnight” routine might check if the garage is open and close it, turn off exterior lights, lock doors, and arm the security system—all from a single voice command.
D. Guest and Family Access
Sharing garage access with family members, delivery services, or guests extends the convenience of smart control beyond the primary account holder.
Family sharing adds household members to the garage access system, each with their own account and app access. Most systems allow unlimited family members at no additional cost, with some providing differentiated permission levels (full adult access versus child access with restrictions).
Temporary access codes or links enable sharing with visitors, contractors, or delivery services without adding them permanently to your system. Key by Amazon delivers packages inside your garage using one-time access that expires after delivery. Dog walkers or housekeepers can receive time-limited access that works only during expected service windows.
Activity logs showing who opened the door when provide accountability. When the garage opens at 11 PM, you can identify whether it was your teenager coming home late or an unknown event requiring investigation.
V. Smart Home Integration Options
Your garage door becomes most valuable when integrated with your broader smart home ecosystem, participating in automations and scenes that involve multiple devices.
A. Security System Integration
Connecting garage door status to your security system treats this massive entry point with appropriate security attention.
Alarm triggering when the garage opens while the system is armed alerts you to potential intrusion through this entry point. The garage entry to your home might otherwise bypass interior motion sensors if intruders enter directly into living spaces.
Camera recording triggered by garage operation captures video of who enters and exits through this door. Combined with integrated or separate cameras viewing the garage interior, you create an activity record of all garage access.
Smart lock coordination can auto-lock the garage entry door whenever the main garage door opens or closes, ensuring both access points are secured when you leave.
B. Arrival and Departure Automations
Location-based automations make garage operation seamless as part of your daily coming and going.
Geofencing opens the door as you approach, eliminating the need to reach for buttons or apps. Your phone’s location reaching your home area triggers the door, and it’s open by the time you pull into the driveway. Configuration requires careful geofence sizing—too large and the door opens when you’re passing by on the next street; too small and you wait for slow GPS positioning to register your arrival.
Departure routines close the garage (if it’s open), verify the closure, and potentially arm security systems, all triggered by your phone leaving the home area. This automation catches the days you forget to close the door yourself, ensuring your home is secured even when distracted.
Multi-person households require consideration of how geofencing works when multiple people come and go on different schedules. The door shouldn’t close behind the first person to leave if others remain home; it should close only when the last person departs. Most systems handle this through presence awareness but configuration complexity increases with household size.
C. Voice and Automation Platform Integration
Connecting garage control to automation platforms like SmartThings, Home Assistant, or Hubitat enables sophisticated multi-device automations.
Scene inclusion adds garage operation to multi-device scenes. A “Welcome Home” scene might open the garage, unlock the entry door, turn on entryway lights, and adjust the thermostat—all from a single button, voice command, or automation trigger.
Conditional automations respond to context rather than simple triggers. Open the garage automatically only if the security system is disarmed and it’s after 5 PM, for example. HomeAssistant users create arbitrarily complex conditions matching their specific household patterns.
VI. Installation and Setup Process
Proper installation ensures reliable operation and maximizes the value of your smart garage investment, whether installing a complete new opener or retrofitting an existing one.
A. Retrofit Controller Installation
Retrofit installation requires basic comfort with electrical connections, though the voltages involved are typically low and safe for careful DIYers.
Step 1: Locate Opener Control Terminals. Find the terminals on your opener where the wall button wires connect—typically two screw terminals sometimes labeled “push” or “button.” These terminals expect a simple momentary short between them to trigger door operation. Your retrofit controller will eventually provide this signal.
Step 2: Mount the Smart Controller. Position the controller within Wi-Fi range, typically near your opener mounted to ceiling or wall. The controller needs power (usually via included power adapter plugged into an outlet) and sufficient Wi-Fi signal. Weak Wi-Fi causes unreliable operation regardless of controller quality.
Step 3: Connect Control Wires. Run the provided wires from the controller to your opener’s button terminals and secure them under the screws. Some controllers include bell wire for this connection; others require your own low-voltage wire. The connection makes or breaks contact when the controller instructs door operation.
Step 4: Install Door Position Sensor. Mount the magnetic sensor with one part on the door itself and the matching part on the frame nearby, aligned so they’re adjacent when the door is closed. The sensor reports door position to the controller—this is how the system knows whether the door is open or closed.
Step 5: Configure the App. Download the manufacturer’s app, create an account, and follow the setup wizard to connect the controller to your Wi-Fi network and your account. Test open and close commands, verify status accuracy, and configure notifications and automations.
B. Smart Opener Replacement Installation
Replacing a complete garage door opener is a more substantial project requiring several hours and moderate mechanical aptitude, though DIY installation is achievable for handy homeowners.
Safety first: disconnect power to the existing opener before beginning work. Garage door springs are under extreme tension and can cause serious injury if mishandled—do not disconnect springs or attempt spring adjustment without proper training and tools.
Remove the existing opener by disconnecting it from the door (via the emergency release lever), removing mounting hardware from the ceiling, and disconnecting power and control wiring. The old opener typically lifts down after removing support brackets.
Assembly of the new opener follows manufacturer instructions, typically including connecting rail sections, mounting the power head to the rail, and installing the drive mechanism. Each manufacturer’s specific design varies; detailed instructions included with your opener guide this process.
Mounting to ceiling uses the existing hanger brackets if compatible or new hardware if provided. The opener must hang level and aligned with the door’s center. Improper alignment creates binding and uneven wear.
Door connection attaches the opener’s arm to the door bracket. Adjust the trolley position and arm length to work correctly throughout the door’s travel. Test manual operation before powering on to ensure nothing binds.
Safety sensor installation positions the infrared sensors at floor level on either side of the door opening. These sensors detect obstructions in the door’s path—code requires them and they must function correctly before regular use. The door should reverse immediately when anything breaks the sensor beam during closing.
Limit and force adjustment sets proper door travel and closing force. The door should stop exactly where it should in both open and closed positions, and closing force should be adequate to close completely but light enough to reverse immediately upon obstruction.
VII. Safety and Security Considerations
Remote control of your garage door creates both convenience and potential security vulnerabilities that require attention.
A. Account Security
Protect your smart garage account with strong, unique passwords and enable two-factor authentication wherever available. A compromised account provides unlimited garage access to anyone with your credentials—a more serious vulnerability than a stolen physical remote which at least requires physical proximity.
Regularly review authorized users and revoke access for people who no longer need it: former housekeepers, ex-partners, old delivery service authorizations. Orphaned access grants persist indefinitely unless you actively remove them.
Use unique credentials for your garage system separate from other accounts. If your email or social media credentials are breached in an unrelated hack, your garage access remains protected with unique credentials.
B. Physical Security
Smart features don’t replace physical security fundamentals that protect against low-tech attacks.
Emergency release protection prevents intruders from using coat hangers or similar tools to disengage the emergency release lever from outside. Simple plastic guards that block access to the release handle prevent this attack without impeding legitimate emergency use from inside.
Vacation mode on some smart systems disables remote opening entirely, requiring physical presence for operation during extended absences. This prevents compromised accounts from being immediately actionable while you’re unable to respond.
Garage entry door security matters because once in your garage, access to your home interior typically requires only defeating a standard door lock. Use quality deadbolts on garage-to-home doors and consider smart lock integration that coordinates with your garage door status.
C. Safety Testing
Monthly safety testing ensures the safety reversal systems that protect people and pets continue functioning correctly.
Photoelectric sensor test: while the door is closing, break the sensor beam with your hand or an object. The door should immediately reverse direction and return to fully open. If it doesn’t, stop using the system until sensors are repaired or replaced.
Force reversal test: place a 2×4 flat on the floor beneath the closing door. The door should reverse when contacting this obstruction, not crush through it. Adjust closing force if the door doesn’t reverse.
These tests take under a minute monthly but verify the systems protecting your family continue working correctly.
VIII. Common Mistakes to Avoid
- Ignoring Wi-Fi Range: Garages often sit at Wi-Fi range limits. Test signal strength where the controller will mount before purchasing. Extending Wi-Fi with mesh or access points prevents the unreliable operation that weak signals cause.
- Incorrect Door Sensor Placement: The position sensor must clearly indicate open versus closed states. Mount so the magnet and sensor align when closed but separate distinctly when open—typically 2+ inches. Marginal alignment causes intermittent incorrect status reporting.
- Skipping Safety Testing: After any installation work, test safety reversal systems before regular use. A door that doesn’t reverse on obstruction can cause serious injury or death to people and pets.
- Forgetting About Physical Security: Remote control provides convenience but doesn’t replace physical security. Don’t neglect window coverings that hide valuables, entry door locks, and emergency release protection just because you have app control.
- Overcomplicating Automations: Geofencing that opens the door as you approach seems convenient until it opens when you’re just walking in the neighborhood or malfunctions and opens at random times. Start conservative with automations and add complexity only after understanding the system’s reliability in your specific environment.
IX. Practical Tips for Smart Garage Success
- Test Monthly: Operate the door from the app, verify status accuracy, and test safety reversal systems. Ten minutes monthly prevents discovering problems when they matter most.
- Keep the Physical Remote: App control is convenient but phones can die, apps can malfunction, and internet can fail. Keep a physical remote in each vehicle as backup access that works regardless of technology problems.
- Set Up Notifications Thoughtfully: Configure alerts for situations that actually need your attention—door open longer than 30 minutes, door opened between midnight and 6 AM—rather than every normal operation which you’ll learn to ignore.
- Share Access Early: Add family members to the system immediately after installation. Figuring out access sharing while someone is locked out or waiting is stressful and unnecessary.
- Document Your Configuration: Screenshot or write down your automation settings, notification preferences, and integration configurations. Firmware updates occasionally reset settings, and documentation makes restoration straightforward.
X. Conclusion
Smart garage door control transforms your home’s largest entry point from a potential security vulnerability into a connected, monitored access system providing remote control, automated operation, and integration with your broader smart home ecosystem. Retrofit controllers from Chamberlain myQ, Meross, and others add these capabilities to existing openers for under $50, making smart garage functionality accessible to nearly any homeowner. Integrated smart openers from Chamberlain, LiftMaster, and Genie provide maximum features and polish for those installing new systems or replacing aging openers. Whether you choose retrofit or replacement, proper installation with attention to Wi-Fi coverage, sensor placement, and safety systems ensures reliable operation that improves both convenience and security for years to come.
Is your garage door already smart, or are you considering adding connectivity? What features matter most for your setup? Share in the comments!