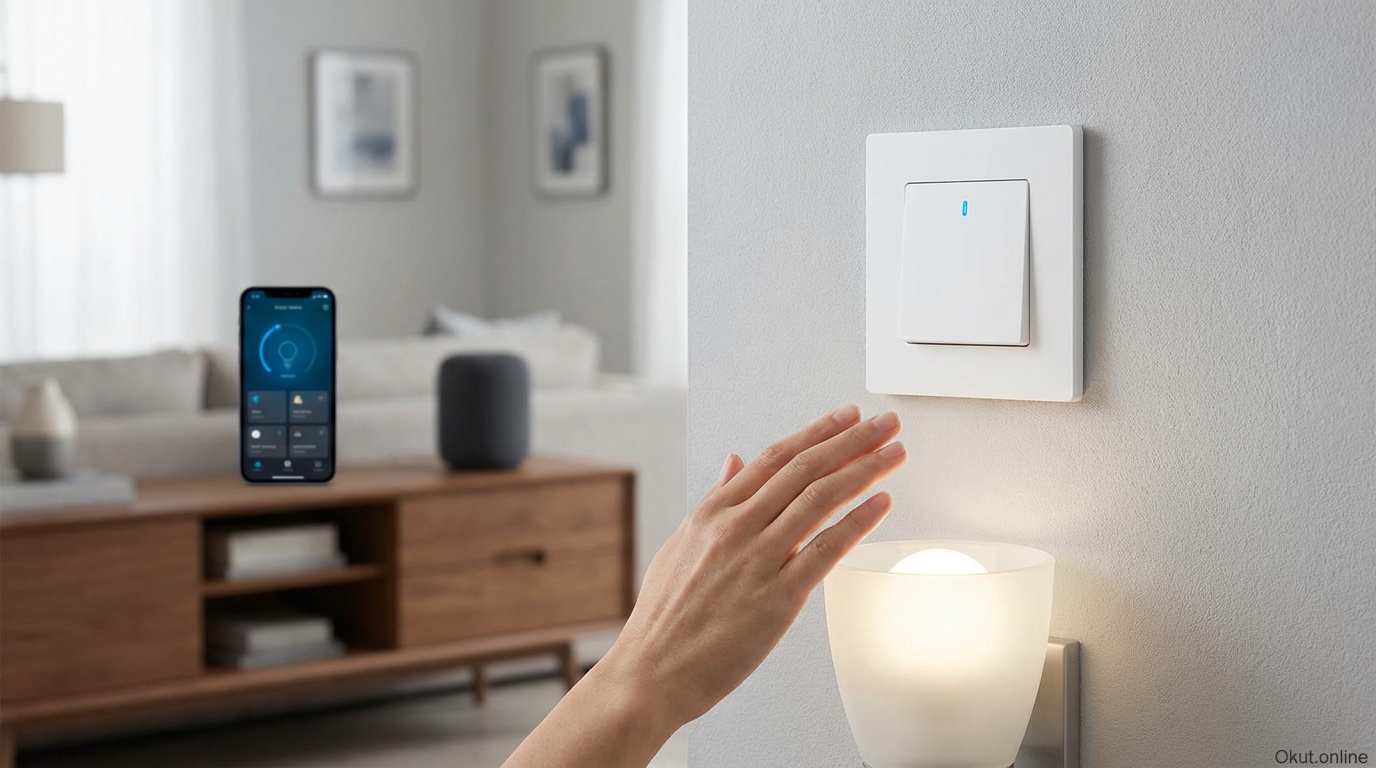
Motion sensor switches automatically control lighting based on occupancy, eliminating the need to remember to turn lights on or off. In 2026, these switches range from basic standalone occupancy sensors to sophisticated smart switches with app control, automation integration, and advanced sensing technology. This comprehensive guide examines how motion sensing switches work, compares top products for different applications, covers installation considerations, and explains how to configure them for reliable, frustration-free operation.
I. How Motion Sensor Switches Work
Understanding the technology behind motion sensing helps you select appropriate switches for different applications and troubleshoot any issues that arise.
A. Passive Infrared (PIR) Detection
The most common motion sensing technology, passive infrared detection, identifies motion by sensing changes in infrared radiation within the switch’s field of view. Every warm object—including humans—emits infrared radiation. When a person moves through the sensor’s detection zone, the shifting infrared pattern triggers the switch.
“Passive” describes the sensor’s operation: it only receives infrared energy without emitting anything itself. This passive approach consumes minimal power and poses no exposure concerns. The sensor simply watches for thermal changes in its environment.
Detection works best when subjects move perpendicular to the sensor (across its field of view) rather than directly toward or away from it. This characteristic affects optimal mounting positions and switch orientation.
Limitations include difficulty distinguishing between human motion and other infrared changes. Heating vents creating air movement, sunlight patterns shifting through windows, or pets moving through the space can all trigger false activations.
B. Ultrasonic Detection
Ultrasonic sensors emit high-frequency sound waves (above human hearing range) and detect motion by sensing disturbances in the reflected sound pattern. When someone moves within the detection zone, the reflected sound pattern changes, triggering activation.
Unlike PIR sensors that require line-of-sight to the heat source, ultrasonic sensors detect motion around corners and behind obstacles. Sound waves bounce off walls and objects, providing coverage even for obstructed spaces.
This broader detection makes ultrasonic well-suited for bathrooms with shower stalls, office cubicle areas, or spaces with visual obstructions that would block PIR sensing.
False triggers can occur from moving curtains, papers rustling in air currents, or even vibrations that disturb the sound field. Ultrasonic sensors tend to be more sensitive than PIR, which provides better occupancy detection but may increase unwanted activations.
C. Dual-Technology Detection
Premium motion sensor switches combine PIR and ultrasonic sensing, requiring both technologies to agree before triggering. This dual-technology approach dramatically reduces false activations since random events rarely fool both sensor types simultaneously.
For initial activation, both PIR and ultrasonic must detect motion—eliminating false starts from either sensor type alone. For maintaining on-state, either sensor detecting continued activity is sufficient, preventing lights from turning off while you’re still in the room.
Dual-technology switches cost more than single-technology options but provide the most reliable operation in challenging environments where single-sensor approaches struggle with false triggers or missed detections.
D. Vacancy vs. Occupancy Modes
The distinction between occupancy and vacancy modes significantly affects energy savings and convenience.
Occupancy mode (auto-on/auto-off) turns lights on when motion is detected and off when the space is vacated. This fully automatic operation requires no user intervention—just walk in and lights activate; leave and they turn off.
Vacancy mode (manual-on/auto-off) requires you to turn lights on manually but turns them off automatically when the space is vacated. This mode saves more energy than occupancy mode since lights only turn on when you specifically want them—not every time someone walks past the sensor.
Many switches offer switchable modes, letting you choose the behavior that best fits each application. Bathrooms often work well in occupancy mode (who wants to find a switch in the dark?), while hallways might benefit from vacancy mode (lights only when you actually need them, not for every pass-through).
II. Top Motion Sensor Switches (2026)
These recommendations cover different use cases, from basic switches to smart-connected options with full automation integration.
A. Lutron Maestro Occupancy Sensor (MS-OPS6M2) – $35
Lutron’s Maestro series represents the gold standard for non-smart motion sensor switches, combining reliability with thoughtful feature design.
XCT sensing technology uses PIR with proprietary enhancements that improve detection reliability while reducing false triggers. Lutron’s years of refinement show in consistent, predictable operation.
Multi-location compatibility works with 3-way and multi-way switch configurations, allowing motion sensing control from multiple locations using standard Lutron companion switches.
Adjustable timeout ranges from 1 to 30 minutes, letting you match off-delay to typical room usage patterns. Quick 1-minute timeout suits hallways; longer 30-minute settings work for offices where you might sit still for extended periods.
Adjustable sensitivity helps tune detection for the specific environment. High sensitivity catches minimal movement; lower sensitivity requires more definitive motion, reducing false triggers in challenging spaces.
Ambient light sensing (optional feature on some models) prevents daytime activation when natural light provides sufficient illumination. This feature maximizes energy savings by not turning on lights that aren’t needed.
No neutral wire required in standard configurations makes installation possible in older homes lacking neutral wires in switch boxes. This compatibility advantage opens motion sensing to homes where smart switches requiring neutral can’t be installed.
B. Leviton Decora Smart Wi-Fi Motion Sensor – $45
Leviton’s Wi-Fi motion sensor switch adds smart home connectivity to traditional motion sensing, enabling app control and automation.
Wi-Fi connectivity allows remote control, scheduling, and monitoring through the My Leviton app. Check whether lights are on, adjust settings, or receive notifications of activity—all from your phone.
Alexa and Google Assistant integration enables voice control of motion sensor behavior. “Alexa, turn off the hallway motion” disables automatic operation when you want manual control.
Customizable timeout (1-15 minutes) and sensitivity settings adjust through the app rather than requiring physical adjustment at the switch.
Activity notifications can alert you when motion is detected in specific areas—useful for monitoring arrival of family members or activity in areas you’re watching.
Auto-on/Auto-off and manual modes provide flexibility between full automation and manual override. The app-based configuration makes mode switching easy.
Neutral wire required limits installation to newer homes with neutral wires present in switch boxes. Check your wiring before purchasing.
C. Lutron Caseta Motion Sensor Switch – $60
Caseta motion sensors integrate with Lutron’s popular smart lighting ecosystem, providing motion sensing within a comprehensive smart home platform.
Caseta ecosystem integration means motion sensors work seamlessly with other Caseta switches, dimmers, and the Caseta Smart Bridge. All devices appear in a single app with unified control.
Smart Bridge connectivity (required, $80+) enables voice control, scheduling, geofencing, and integration with platforms including Apple HomeKit, Google Home, and Amazon Alexa.
Clear Connect RF technology provides reliable wireless communication that doesn’t suffer from Wi-Fi congestion issues affecting some smart devices.
Pico remote compatibility allows adding physical remote controls that override or supplement motion sensing behavior.
No neutral wire required expands installation compatibility to older homes, a significant advantage for the smart switch category.
Premium pricing reflects the Caseta ecosystem investment. If you already have Caseta devices, adding motion sensors makes sense; if not, evaluate whether the ecosystem benefits justify the higher costs compared to alternatives.
D. GE Enbrighten Z-Wave Motion Switch – $55
For homes using Z-Wave based smart home systems (SmartThings, Hubitat, Home Assistant), GE’s Z-Wave motion switch provides direct integration.
Z-Wave Plus connectivity integrates with Z-Wave hubs for centralized control and automation. The switch becomes part of your broader Z-Wave mesh network, participating in automation rules and scenes.
Occupancy and vacancy modes are switchable between automatic and manual-on options.
Automation trigger capability allows using motion detection as a trigger for other smart home actions—motion in the garage triggers lights AND starts recording on the garage camera, for example.
Multi-location wiring support works with GE add-on switches for 3-way and 4-way configurations.
Neutral wire required for installation limits compatibility to homes with modern wiring.
Hub required for smart features means this switch requires a Z-Wave controller. For basic motion sensing without smart features, simpler options exist; this switch is appropriate when smart integration is specifically required.
III. Installation Guide
Motion sensor switch installation follows standard switch replacement procedures with a few additional considerations for proper operation.
A. Wiring Requirements
Most motion sensor switches require more wiring connections than basic toggle switches they replace.
Line (hot), Load, and Ground represent minimum connections present in all switch boxes. These wires carry power from your panel (line), send power to the light fixture (load), and provide safety grounding.
Neutral wire—the white return path wire—is required by many smart motion switches but absent from many older switch boxes. Verify neutral presence before purchasing switches that require it. Switches noting “no neutral required” work in boxes lacking this wire.
Multi-way wiring for 3-way or 4-way configurations requires compatible switches designed for multi-location control. Standard single-pole motion switches don’t work in multi-way circuits without modification or companion switches.
B. Physical Installation Steps
Step 1: Turn off power at the circuit breaker. Verify power is off using a voltage tester before touching any wires.
Step 2: Remove the existing switch cover plate and mounting screws. Pull the switch carefully from the box.
Step 3: Photograph existing wire connections for reference. Disconnect wires from the old switch.
Step 4: Connect new motion switch following manufacturer wiring diagrams. Use wire nuts for connections; ensure secure connections on all terminals.
Step 5: Push wires carefully into the box and mount the new switch. Avoid pinching wires.
Step 6: Install the new cover plate and restore power.
Step 7: Test operation and adjust settings. Walk through the detection zone to verify activation; test auto-off timing; adjust sensitivity if needed.
C. Configuration and Adjustment
Most motion switches include adjustable settings for timeout duration and detection sensitivity.
Timeout adjustment sets how long lights remain on after the last detected motion. Short timeouts (1-5 minutes) suit pass-through spaces like hallways; longer timeouts (15-30 minutes) prevent premature shutoff in spaces with less continuous movement.
Sensitivity adjustment controls how much motion triggers activation. Low sensitivity requires more substantial movement; high sensitivity responds to minor motion. Start with medium sensitivity and adjust based on actual performance.
Vacancy vs. occupancy mode selection (on switches with both options) determines whether lights turn on automatically or require manual activation.
Ambient light threshold (on equipped switches) prevents daytime activation. Adjust to match your preference for when automatic lighting should engage.
IV. Optimal Placement and Application
Different spaces benefit from different motion switch approaches and configurations.
A. Bathrooms
Bathrooms are ideal candidates for motion switches—no one wants to find a switch in the dark, and no one wants lights left on in an empty bathroom.
Occupancy mode works well since automatic activation upon entry is almost always desired.
Extended timeout (10-30 minutes) prevents the embarrassing situation of having lights turn off during a shower or bath where motion detection is limited.
Dual-technology sensors or ultrasonic sensors handle bathrooms with shower curtains or separate toilet compartments better than PIR-only options that require line-of-sight.
Night-light feature on some switches provides low-level illumination even when the main light is off—useful for midnight bathroom visits where full brightness is unwelcome.
B. Hallways and Stairways
High-traffic pass-through areas benefit from motion sensing that eliminates switch hunting while ensuring lights don’t stay on unnecessarily.
Vacancy mode might be preferable to prevent lights triggering for every pass-through when you don’t need illumination. Manual activation puts you in control; automatic shutoff prevents wasted energy.
Short timeout (1-5 minutes) suits spaces you traverse quickly. Lights turn off soon after you pass, rather than burning for 30 minutes after brief hall passage.
Stairway safety considerations favor occupancy mode for automatic illumination that prevents navigating stairs in darkness. Safety outweighs minor energy considerations.
C. Garages and Utility Spaces
Spaces where your hands are often full benefit particularly from hands-free automatic lighting.
Occupancy mode eliminates fumbling for switches when carrying groceries, tools, or laundry.
Longer timeout (15-30 minutes) accommodates projects and activities where you might be stationary for periods—working at a bench, loading/unloading a car, or organizing storage.
High sensitivity in larger spaces ensures detection across the full area rather than requiring entry into a small detection zone near the switch.
D. Home Offices
Office spaces present a challenge: extended periods of minimal motion while working at a computer.
Maximum timeout (30+ minutes) reduces premature shutoffs, but even maximum timeout may not prevent shutoffs during focused desk work.
Dual-technology or ultrasonic sensors detect the minor movements of typing, shifting in your chair, or small gestures that PIR-only sensors might miss.
Alternative approach: use vacancy mode so lights stay on once you manually activate them, turning off only when you leave. This prevents the frustration of waving at the ceiling to retrigger motion.
V. Smart Home Integration
Smart motion switches extend their utility beyond basic occupancy sensing into comprehensive home automation.
A. Motion as Automation Trigger
Smart motion switches can trigger actions beyond just turning on the light they control.
Security integration uses motion detection to trigger camera recording, send notifications, or activate alarms. Motion in the garage at 2 AM might warrant different response than motion at 6 PM.
HVAC integration adjusts temperature based on room occupancy detected by motion switches. Why heat or cool rooms no one is using?
Multi-room coordination uses motion in one area to affect lighting in others. Motion in the kitchen might activate pantry lighting; motion at the front door might illuminate the hallway.
B. Time-Based Configuration
Smart switches enable different behavior at different times of day.
Nighttime dimming might reduce activation brightness from 100% during evening hours to 20% for midnight bathroom visits—enough visibility without sleep-disrupting brightness.
Working hours disabling might turn off automatic activation during times when natural light is adequate or no one is typically home.
Weekend schedules might differ from weekday behavior to match different occupancy patterns.
C. Override and Manual Control
Even the best motion sensing occasionally needs human override.
Manual off disables the light even though motion is detected—useful when you want darkness for movie watching or going to sleep while still in the room.
Manual on locks lights on regardless of sensor state—useful when you’ll be stationary for extended periods that might cause false unoccupied detection.
Voice control override through smart assistants provides convenient access to manual control without approaching the switch.
VI. Common Mistakes to Avoid
- Ignoring Neutral Wire Requirements: Purchasing smart switches requiring neutral wires for installation in boxes without neutral wastes time and returns. Verify wiring before buying.
- Wrong Sensor Type for Application: PIR sensors in bathrooms with shower curtains blocking line-of-sight fail to detect occupancy. Match sensor technology to space characteristics.
- Too-Short Timeout: Aggressive energy-saving timeouts that turn off lights while you’re still using the space create constant frustration. Start with longer timeouts and reduce only if clearly unnecessary.
- Maximum Sensitivity in Problematic Locations: High sensitivity in rooms with HVAC vents, sunlight exposure, or pet access causes constant false activations. Tune sensitivity appropriately for each location.
- Occupancy Mode Where Vacancy Works Better: Automatic activation in every pass-through space wastes energy compared to vacancy mode where you control when lights are actually needed.
- Installing Without Testing All Zones: Detection patterns vary. Walk through all areas of rooms to verify coverage reaches everywhere you need it, not just directly in front of the sensor.
VII. Practical Tips for Motion Switch Success
- Test Before Finalizing Installation: Before mounting the switch permanently, test detection coverage throughout the room. Adjust positioning if coverage has gaps.
- Start Conservative, Then Adjust: Begin with longer timeouts and moderate sensitivity. Live with the switch for a week before fine-tuning settings based on actual use experience.
- Consider Detection Angle: PIR sensors have wider detection perpendicular to the sensor than straight-on. Mount switches where typical movement crosses the detection field rather than moving directly toward/away from the sensor.
- Label Multi-Way Configurations: In 3-way or 4-way setups, label which switch has the motion sensor and which are companion switches. This helps future troubleshooting and family understanding.
- Educate Household Members: Explain how motion switches work so family members understand they can’t just flip switches like traditional lights. Unexpected behavior frustrates if not understood.
- Seasonal Adjustment: Sensitivity that works in winter might be too high in summer when HVAC activity increases. Revisit settings if false triggers increase seasonally.
VIII. Conclusion
Motion sensor switches eliminate the eternal challenge of lights left on in empty rooms while providing hands-free convenience that improves daily life. Whether you choose basic occupancy sensors from Lutron for reliable standalone operation, smart-connected options from Leviton for app control, or ecosystem-integrated solutions from Caseta or GE for comprehensive home automation, properly selected and configured motion switches reduce energy waste while improving convenience. Match sensor technology to space requirements, configure timeout and sensitivity appropriately for each application, and take advantage of smart features when they add genuine value. The result is lighting that works with your life rather than requiring constant management.
Which rooms in your home would benefit most from motion sensor switches? What frustrations do you have with current lighting that motion sensing could solve? Share your ideas in the comments!